1. Click on the Finder icon  in the Dock along the bottom of the screen.
2. Press the keys Command and K at the same time to bring up the ‘Connect to Server’ window:
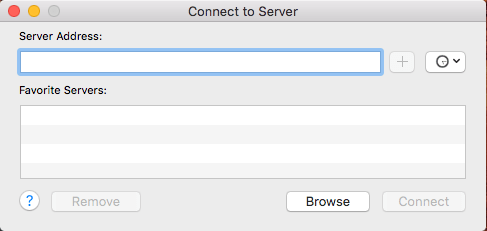
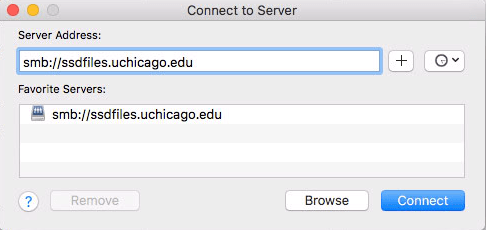
3. In the Server Address field, enter the full path of the network share.
- For a Group share: smb://ssdfiles.uchicago.edu/<sharename>
- For a Home directory: smb://ssdfiles.uchicago.edu/home/<your_cnet_id>
Click on the “+” icon just to the right of the Server Address bar button. Then click on the Connect button.
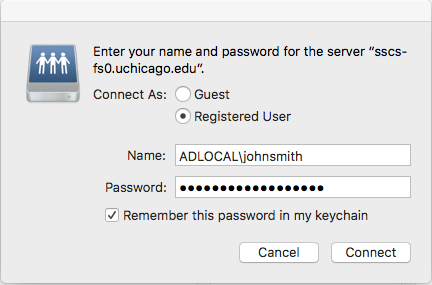
4. At the prompt for your login name, make sure that the radial button for Registered User is selected. You will type in ADLOCAL immediately followed by a backslash and your CNET ID, with no spaces. For example, if your CNET ID were johnsmith, you would type in ADLOCAL\johnsmith and for your password, you would type in your CNET password (the same one that you use for U of C email), as shown in the graphic below. You may optionally choose to save your password by clicking on the checkbox for Remember this password in my keychain. Finally, click on the OK button to mount the network drive.
5. The mapped drive will now appear in the Finder.
IMPORTANT REMINDER: When you log in to the server, you will be prompted for your correct username and password. Be sure to use the prefix ADLOCAL\ with your CNET ID and also be sure to type in your correct CNET password (the same one you use for U of C email). The most common reason why users can’t log in is that they forget to type the ADLOCAL\ prefix with their username.