There are a few ways to screenshot on your computer depending on your Operating System.
Windows
Snip & Sketch:
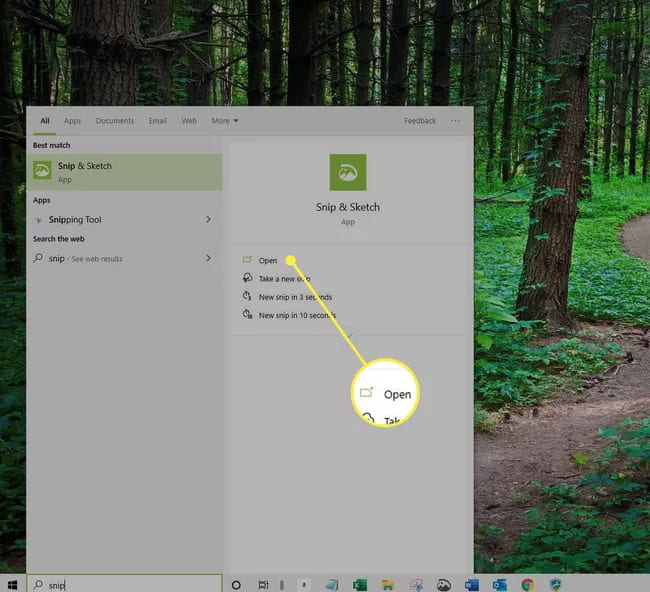
- You can use the Windows app ‘Snip & Sketch’ by searching for it in the Windows Search box near the Start button and clicking ‘Open’ or by pressing and holding these three keys at the same time: Windows key + Shift + S
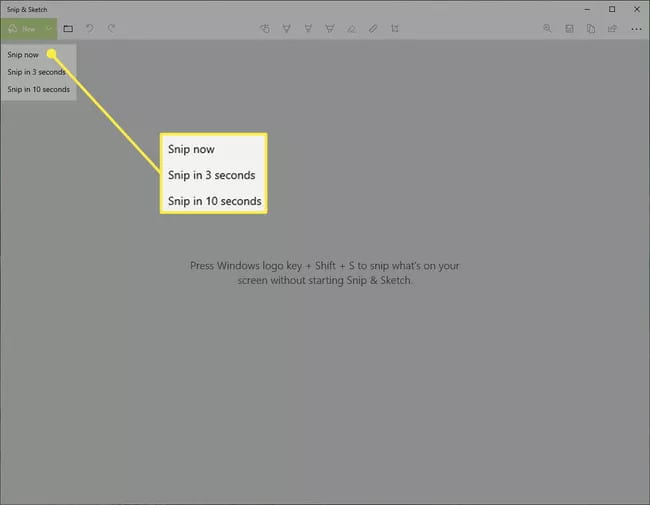
- Select the arrow next to New to open the Delay drop-down menu and select a delay time, if desired. Otherwise, choose New. The Snipping Bar will open.
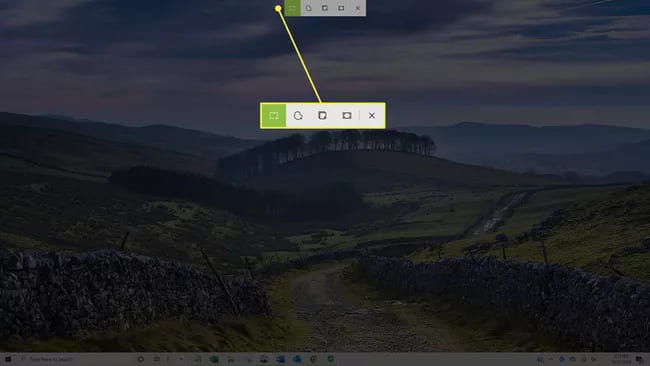
- Select a mode. If you select Window Snip or Fullscreen Snip, select any area on the screen to take a snip. If you select Rectangular Snip or Freeform Snip, click and drag the area of the screen you want to snip.
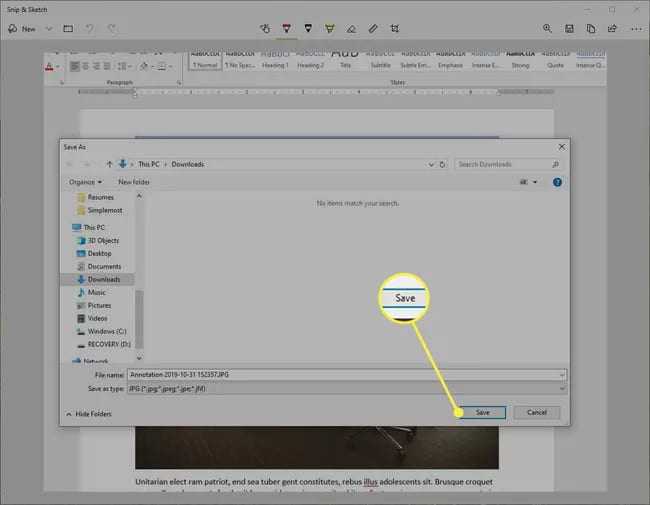
- Your snip will appear in the Snip & Sketch window. Make any necessary changes or annotations using the tools in the editing toolbar and click the floppy disk icon to save your screenshot.
Mac
Screenshotting your entire screen:
- To capture your entire screen, press and hold these three keys together: Shift, Command, and 3.

- You should see a thumbnail in the bottom right corner of your screen. Click it to edit the screenshot or simply wait for the screenshot to save to your desktop.
Screenshotting a portion of your screen:
- To capture a portion of your screen, press and hold these three keys together: Shift, Command, and 4.

- Drag the crosshair to select the area of the screen to capture. To move the selection, press and hold Space bar while dragging. To cancel taking the screenshot, press the Esc (Escape) key.

- To take the screenshot, release your mouse or trackpad button.
- You should see a thumbnail in the bottom right corner of your screen. Click it to edit the screenshot or simply wait for the screenshot to save to your desktop.