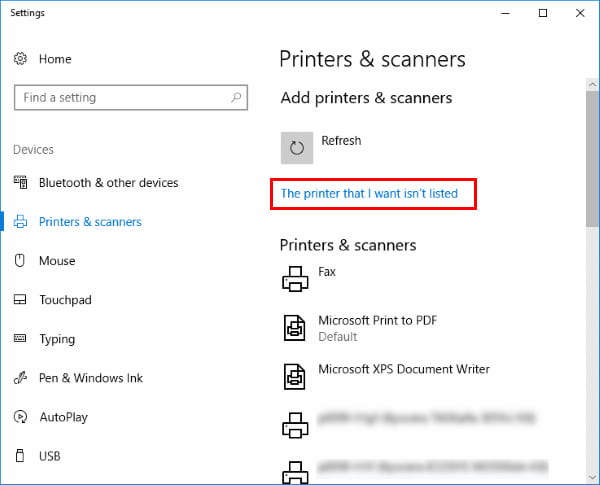
- Select “Start” and type “printers” in the search box.
- Choose “Printers & scanners“.
- Select “Add a printer or scanner“.
- Wait for the “The printer that I want isn’t listed” option to appear, then select it.
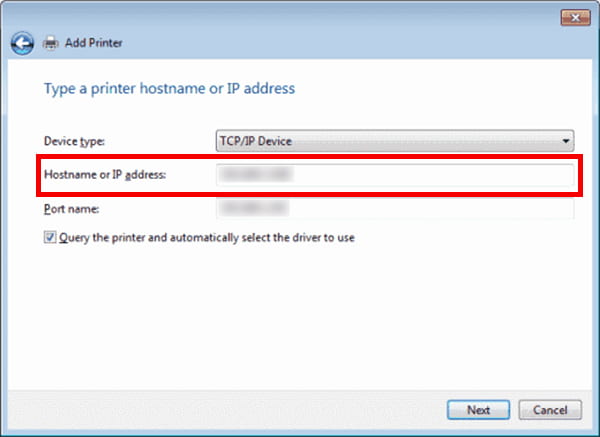
- Select “Add a printer using a TCP/IP address or hostname” , then select “Next“.
- Select “TCP/IP Device” in the “Device type” list.
- Type the hostname or the IP address of the printer. Select “Next“.
- Windows should find the printer if the printer is on and configured correctly. You may have to specify more information. If prompted, Select the type of network adapter installed in the printer in the “Device Type” drop-down list. You can also click “Custom” to specify custom settings for the network printer. Select “Next“.
Windows will now walk you through installing the drivers for the printer. After that is complete, you should be able to print to the printer via direct IP address.